
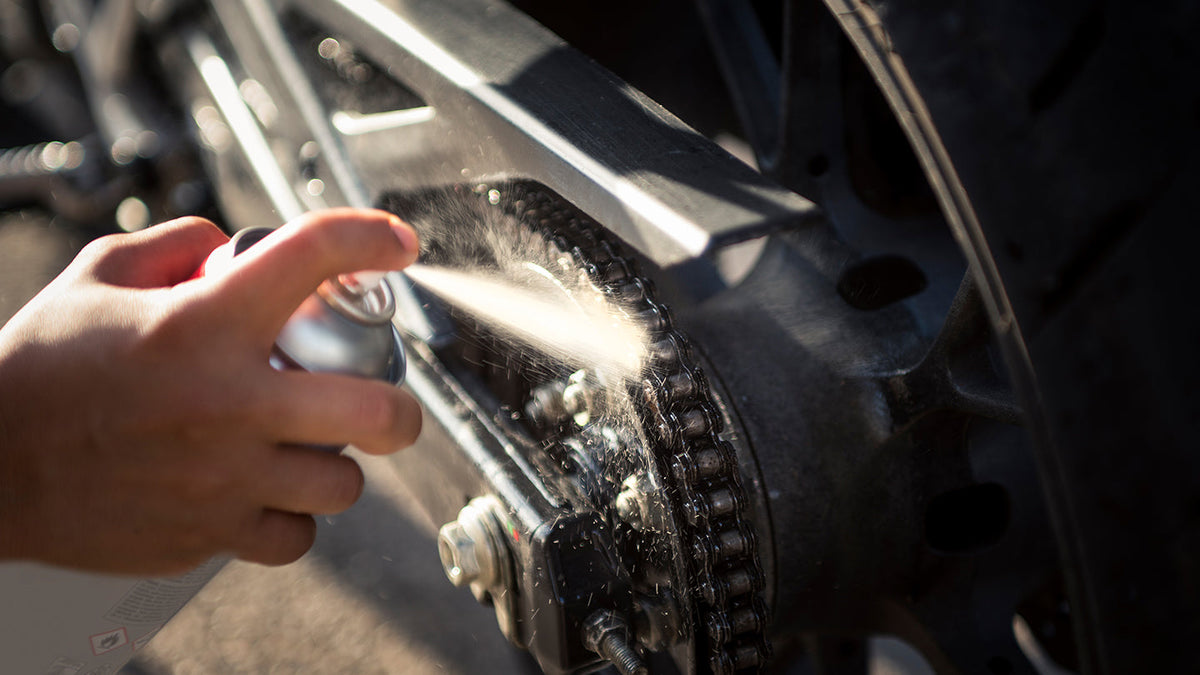
A clean, well-lubricated chain runs quieter, cooler, and lasts far longer than a neglected one. Grit and old lube build up into an abrasive paste that grinds away at the chain and sprockets, while a dry chain overheats and wears its O-rings. Knowing how to clean and lubricate a motorcycle chain is a simple, satisfying task that pays back in smoother running, longer component life, and money saved. This guide walks through the tools, the safe products, and the step-by-step process.
Why Chain Cleaning and Lubrication Matter
The chain operates exposed to road grime, water, and grit. As it spins, debris sticks to the lubricant and forms a black, abrasive paste that works like sandpaper between the chain and sprockets. Left alone, this accelerates wear on the chain's O-rings, the sprocket teeth, and the chain's internal pins, shortening the life of the whole drive line. Regular cleaning removes the abrasive buildup, and fresh lubricant reduces friction, cushions the O-rings, and displaces moisture to prevent rust. A maintained chain can last twice as long as a neglected one.
How Often to Clean and Lube
As a general guide, clean and lubricate the chain every 300–600 miles (500–1,000 km), or more often in wet, dirty, or off-road conditions. After riding in the rain, lube the chain promptly because water washes lubricant away and invites rust. Always check chain slack as part of the routine - see our guide on how to adjust a motorcycle chain. The best time to lube is right after a ride, when the chain is warm and the lube penetrates and flows into the O-rings.
Tools and Products You Will Need
- A rear stand or center stand to lift the rear wheel so it spins freely.
- A chain cleaner - use a dedicated motorcycle chain cleaner or kerosene. Kerosene is the traditional, O-ring-safe choice; it cuts grime without damaging the rubber seals.
- A soft-bristled brush - a dedicated chain brush, an old toothbrush, or a gear brush. Avoid wire brushes, which can damage the O-rings.
- A rag for wiping.
- Chain lube - a dedicated motorcycle chain lube designed for O-ring or X-ring chains. Choose one that flings off minimally and resists water.
- Gloves and eye protection.
- A piece of cardboard to shield the wheel, tire, and brake disc from overspray.
Avoid harsh solvents like gasoline, brake cleaner, or carb cleaner on O-ring chains - they swell and damage the rubber seals, ruining the chain. When in doubt, use a product labeled safe for O-ring chains.
Step 1: Prep and Protect
Put the bike on its stand so the rear wheel turns freely. Slide a piece of cardboard between the chain and the rear wheel and brake disc to catch cleaner and lube overspray - these products can contaminate brake pads and tires, which is dangerous. Put on gloves and eye protection.
Step 2: Apply Cleaner and Scrub
With the wheel raised, spray chain cleaner (or kerosene from a squeeze bottle) onto the lower run of the chain where it contacts the rear sprocket. Rotate the wheel backward slowly so you treat the entire chain, working in sections. Let the cleaner sit for a minute to break down the grime. Then scrub the chain with your soft brush, working along the rollers and side plates. A grungy chain will release a lot of black, dirty liquid - that is the abrasive paste coming off. Reapply cleaner and scrub stubborn spots. Avoid spraying cleaner directly at the front sprocket area, where it can pool behind the cover and reach the engine seal.
Step 3: Wipe and Rinse
After scrubbing, wipe the chain down with a clean rag to remove the dissolved grime and excess cleaner. Rotate the wheel and wipe the entire length. Some riders give the chain a final light spray of cleaner and a second wipe to get it as clean as possible. The cleaner must evaporate fully before lubricating, so let the chain sit for a few minutes or wipe it thoroughly dry. A wet, dirty chain will not let the lube adhere properly.
Step 4: Inspect the Chain and Sprockets
While the chain is clean and exposed, take the chance to inspect it. Check the slack and adjust if needed. Look for tight and loose spots, kinks, or stiff links as you rotate the wheel - these indicate wear or corrosion. Examine the sprocket teeth: they should be symmetrical, not hooked or sharpened like a wave. Hooked teeth mean the sprockets - and likely the chain - need replacement. Catching this now saves a roadside failure later.
Step 5: Lubricate the Chain
With the chain clean and dry, apply a quality chain lube. The goal is to lube the rollers and the O-rings, not to coat the side plates thickly. Spray the lube onto the inside of the lower run - the side that contacts the sprockets - while rotating the wheel backward slowly. Centrifugal force when riding pushes the lube outward into the O-rings, so applying to the inside gets it where it needs to go. A light, even coat is better than a heavy one, which only flings off and makes a mess. Avoid getting lube on the tire or brake disc; wipe any overspray immediately.
Step 6: Let It Set
Let the lube set for 10–15 minutes before riding, so the solvents flash off and the lube becomes tacky and clings to the chain. This prevents most of it from flinging onto your wheel and swingarm on the first ride. Some riders lube the chain the night before a ride for the cleanest result.
Tips for a Longer-Lasting Chain
- Never use a pressure washer on the chain - it forces water past the O-rings and washes out the internal lubricant, ruining the chain.
- Lube after wet rides to displace water and prevent rust.
- Keep the chain properly adjusted — a too-tight or too-loose chain wears faster. See our chain adjustment guide.
- Replace chain and sprockets as a set. A new chain on worn sprockets wears out fast.
- Clean the rear sprocket face while you are at it; built-up grime there accelerates chain wear.
Common Mistakes to Avoid
- Using WD-40 or solvents on O-ring chains, which damage the seals.
- Lubing a dirty chain, trapping grit as an abrasive paste.
- Over-lubricating, which flings off and makes a mess without helping.
- Getting lube on the brake disc or tire, which is dangerous.
- Skipping the set time, so the lube flings off immediately.
Final Thoughts
Cleaning and lubricating your motorcycle chain is one of the highest-value maintenance tasks you can do, taking only minutes and doubling the life of your drive line. Lift the wheel, clean with an O-ring-safe cleaner and a soft brush, wipe dry, inspect for wear, and apply a light coat of quality chain lube to the inside run. Do it every few hundred miles and after every wet ride. Combine this with proper chain adjustment and the rest of your maintenance schedule, and your chain and sprockets will deliver thousands of smooth, quiet, trouble-free miles.
Share: